My First Handmade Bushcraft Knife
Everyone can make their own knife. Even a programmer with no previous experience in crafting wood and metal. It is the very basic tool useful in many situations. And if you dedicate it your love and passion it will serve you along time and make you happy evertime you use it. Here's how I hand-made my first bushcraft knife for almost $0 from an old saw blade, juniper wood and a welding electrode.
Why?
A complete photo gallery on Flickr.
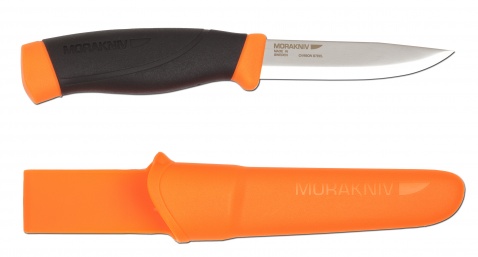
As I was on the Scandinavia Road Trip it took with me my little Swiss army knife which is very portable, nice for small woodwork. I carry it almost everytime and it's very useful. Also I took a somewhat bigger Mora knife. I use it mainly for preparing food (cutting onion and geasing my bread) and just in case I needed to cut bigger branches or split some wood. I found it at my parents, better than nothing for that travel, but I found the plastic parts not very comfortable and pleasing for eye.
I was thinking about things I should learn and try to do after I return. I definitively didn't want to sit around at the computer all day long, but do something more ballsy. I decided to make bushcraft trips more often and to learn more about survival in nature.
What I wanted for bushcraft was a little bigger rugged knife. I started looking at the internet for all about knives. What are different type, how to use them effectively, what is for sale and even how to make them. I quickly found that I don't like how most of the knives on the market look - just too unpersonal. Of course there were beatiful knife one can admire, usually hand-made and with respective price tag. Hand work is just expensive.
Meanwhile I saw many photos and videos of people making their own knives completely to their own aesthetic taste. Many of them were amateurs or they were made using just basic tools. Some of them were just beatiful and very inspiring, eg. Trollsky Custom Knives (YouTube, FB) from Poland. When I learnt some of the theory behind and of the principles of the techniques it stopped looking just impossible to make my own knife as I imagined it. Although I'm a geek with just a little practical experience in making hardware I took it as a challenge.
What?
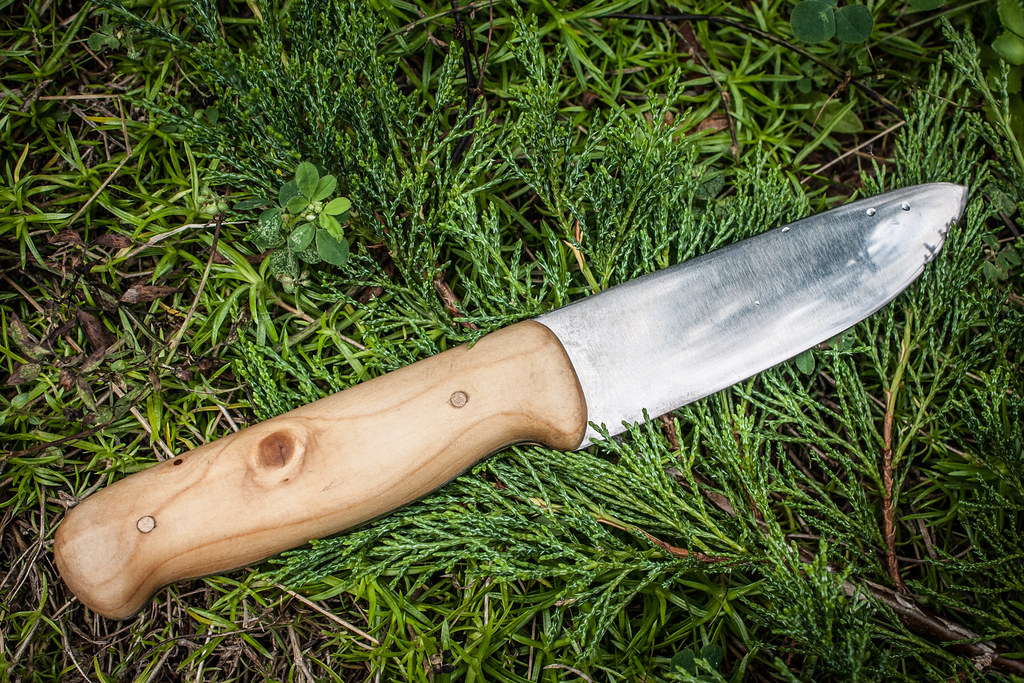
As a first knife I wanted a bigger full-tang bushcraft knife. Fortunately my daddy is a mechanical engineer and has a lot of tools, materials and useful advices. For the blade we found an old saw blade from an old cutter made of high quality carbol steel. The handle is made of juniper wood. The tree allegedly grew for about fifty years near a cemetery and then the wood has dried for years under a roof of an outside fireplace. The brass pins were cut from an old welding electrode.
How?
For several evenings I drew on paper various shapes of the blade and the handle until I was visually satisfied. The resulting knife is still a bit different, however.
Then came the day D. I drew the shape on the plate with an black alcohol marker and realized that the blade is too small it at the same level at the hand, so that if it slips forward it can cut the finger. Thus I decided to make the blade slightly bigger. It also looked better.
Then we cut it around with a portable wheel grinder. Then with the grinder and then a belt sander I took off material from the blade to made a very rough edge. I originally wanted to make scandi grind but it turned of to be quite different - big edge across the whole blade with a small sharp convex edge.
Since the stell is hard in its present state I didn't want to soften the steel and quench it again since I couldn't do it so well. Thus I had to remove the material even if it was hard. And it's true that removing it was hard too.
I wanted the handle to be secured in two ways - with epoxy glue and with brass pins. For them I needed to make holes in the steel. Since the steel was hard I couldn't use an ordinary drill. Fortunately in a shop in the town they had exactly the special drill I needed. With it it was very easy to drill through even using a battery-powered tightener. In a minute there were two nice holes.
Next I needed to prepare the wood for the handles. Just a few whiles with the saw and a log was split in halves. Then I shaved it to made a flat surface. With a pencil I drew the outline of the handle and with my Swiss knife I cut the excess wood.
Then I cut the pins from an old electrode. The diameter was almost the same as the holes. Well the holes were just a very little bit tight so I needed to sand the pins to fit.
Now everything was prepared to get the parts together. I bought some epoxy glue and started gluing them together. First, with some thinner I got rid of grease from all the surfaces. Then I just mixed the two parts of the glue, brushed it over the metal, wood and pins, put them together, wrapped in some hard paper and clamped into a vice overnight. After a day or two it was nicely dried.
The next task was to shape the handle. With a belt sander I took of the outline to match the wood with the metal. Then I took off the sanding paper beld and sanded the edges by hand. Unfortunately I had no fine sand paper, so the surface remained a bit rough.
Shaping the handle was a very creative process. I kept looking at the wood, evaluating if I like it and grinding it more. It took a bit of a 3D shape so that the handle fits into my hand well. Holding my own knife for the first time was a very satisfying moment.
The wood needs to be impregnated to prevent absorbing moisture and rotting. One common option is oil, the other is wax. I decided to use bees wax from an old candle that I gave to my grandpa years ago. It smells really wonderfully and should not smell like beting rotten like some oils. Moreover it should not make a hand greasy and melt on sunlight.
I heated some wax inside an aromatherapy fountain and coated the handle with a brush. Then I let the wax soak inside the wood well by heating it with a hair-dryer. Afterwards I polished the surface with a rag and get off the excessive wax.
Now the knife was almost completely done. It looks beautiful to me! It's my own baby :) Still it needed a sharp edge. So I bought a set of water-resistant sandpapers to make a nice sharp edge. A trick: look at the edge towards light. If you see a reflection it is not sharp. There are still some reflections so I need to sand somewhat more. A patina made using some acid would be nice and useful to protect the blade.
This autumn the woods were full of delicious mushrooms and my knife was there to clean them. It is also useful in the kitchen, eg. to prepare a bottle of marinated wursts.
It took me about a month or two of weekends to make my own knife as I imagined it. The total cost was negligible - some glue, drill and sandpapers. I have a nice tool that I can be whenever I go to the wood.
But the most important thing is I learned something very useful and realized that you just need desire and invest some time to make the seemingly impossible.
Comments
Comments powered by Disqus